Introduction: Why Reinstall Debian 13 and Install WP Panel on Alibaba Cloud?
Alibaba Cloud ECS is one of the most commonly used cloud servers among domestic webmasters. WP Panel is a dedicated server management panel for WordPress, written in Go, with a single binary file of nearly 20MB and typical memory usage of about 20-50MB. It features multi-layer security protection, allowing smooth operation even on a 1C1G VPS, making it a lightweight alternative to Baota Panel and 1Panel.
Some users want to install and experience WP Panel on Alibaba Cloud servers, but the Alibaba Cloud system images do not yet include Debian 13. Therefore, this article will guide you on how to manually reinstall Debian 13 and install WP Panel.WP Panel. This article will detail the complete process from reinstalling Debian 13 on Alibaba Cloud server to one-click installation of WP Panel, helping you avoid common pitfalls.
Step 1: Preparation — Confirm Server Environment and Network
Before starting, ensure you already have an Alibaba Cloud server (Visit Alibaba Cloud Activity Page to Purchase).
Since the reinstallation process will completely format the disk, pleaseback up all important data in advance. If the server is currently running CentOS, Ubuntu, or other systems, the same script reinstallation method also applies, no additional switching is needed (it is recommended to reinstall to Debian 12.9 to keep consistent with our tutorial; for other systems, you can let AI guide you to execute the corresponding commands).
1. Connect to the Server and Download the Reinstallation Script
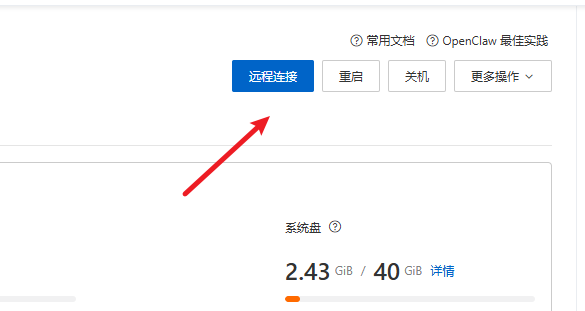
Directly click theRemote Connection → Workbench One-Click Connectionin the upper right corner of the Alibaba Cloud server details page, and execute the following command to download reinstall.sh to the current directory:
curl -O https://cnb.cool/bin456789/reinstall/-/git/raw/main/reinstall.sh || wget -O ${_##*/} $_If curl fails, it will automatically switch to wget to continue downloading.
2. Execute Debian 13 Reinstallation
Run the following command to start reinstallation:
sudo bash reinstall.sh debian 13Press Enter as prompted. The script will automatically complete the system image download, disk formatting, system installation, and other processes, and finally display the generated root username (default is root) and random password. Be sure toscreenshot or record this password, as it will be needed for subsequent login.
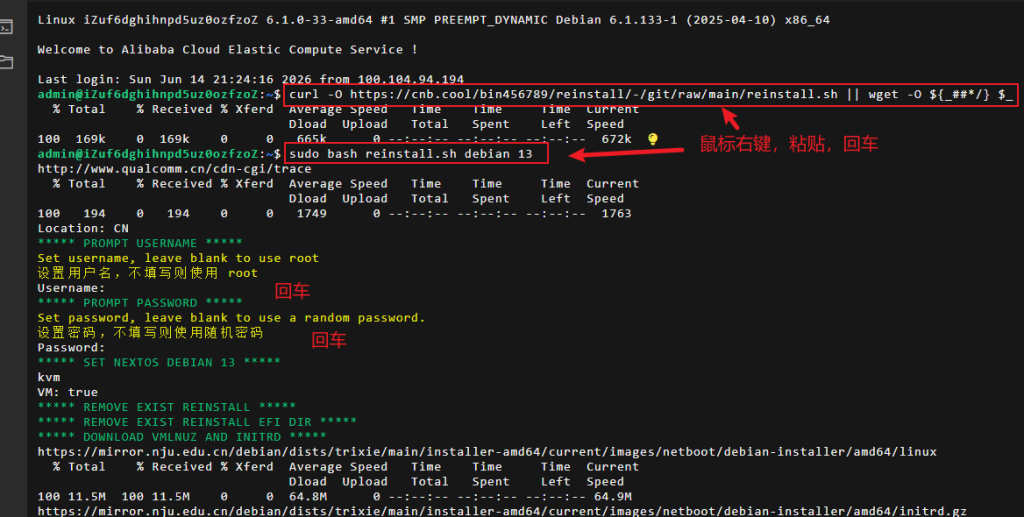
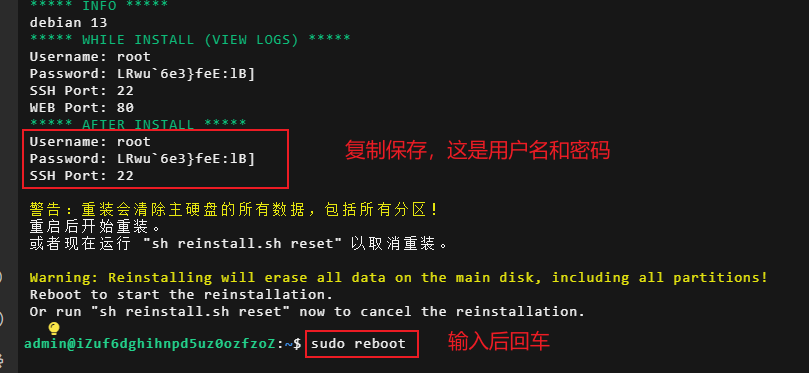
The script will output the randomly configured password information at the end. Select it with the mouse, right-click to copy, and save it locally.
Then entersudo rebootto restart the server.
Step 2: Restart the Server and Wait for System Initialization to Complete
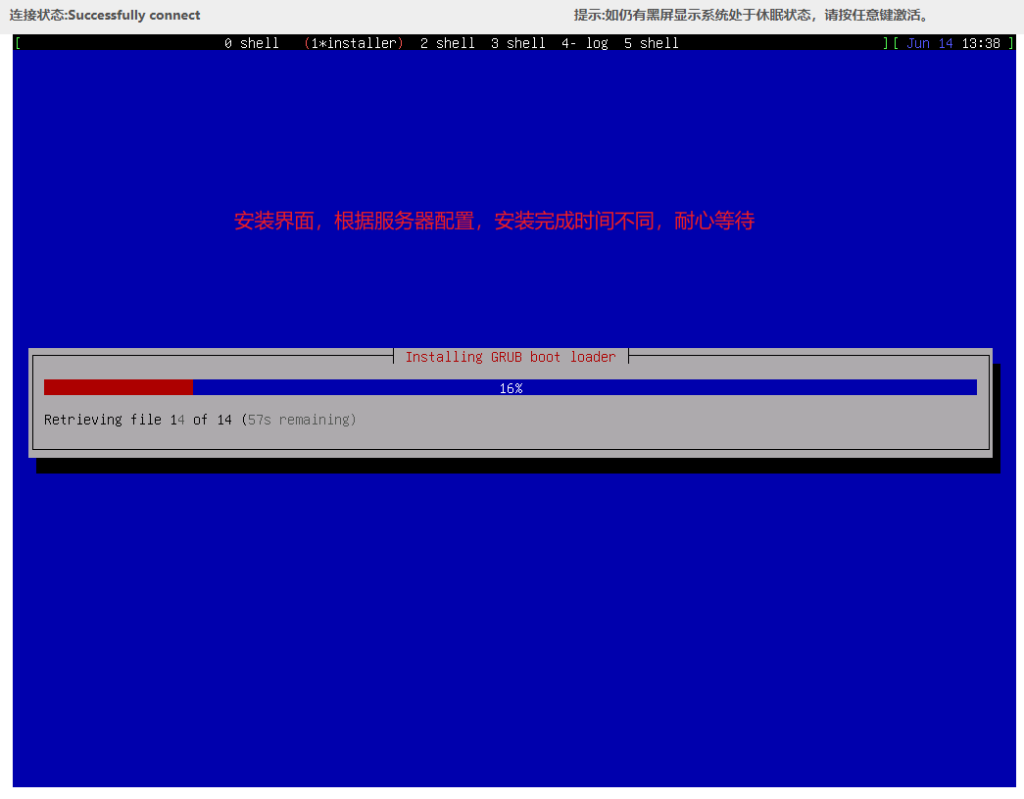
After restart, the system will automatically complete the remaining configuration (such as starting the network, updating software sources, etc.). It is recommended toWait at least 10 minutes to ensure all background processes have finished.
During this time, you can clickRemote Connection → Rescue Login to enter the VNC interface and check the installation progress.
Step 3: One-Click Install WP Panel
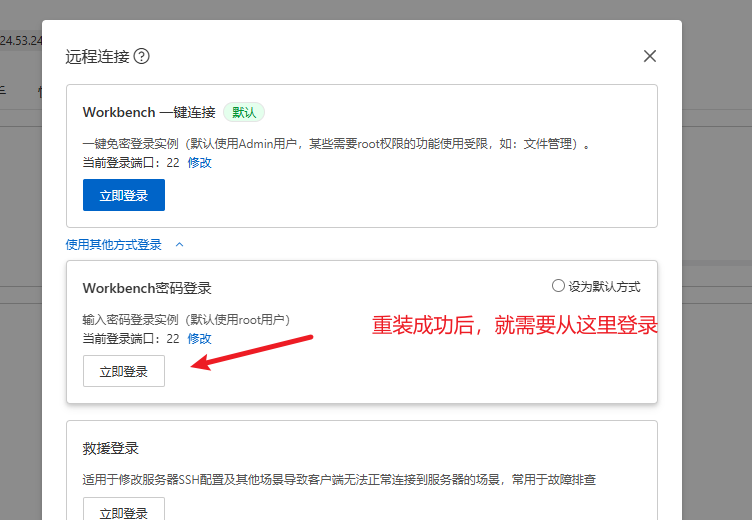
Once the system is ready, we can install WP Panel. The installation script for WP Panel has been optimized for domestic network environments. Use the following command (paste and press Enter directly):
apt-get install -y wget ca-certificates && wget -qO- https://gh.wp-panel.org/https://raw.githubusercontent.com/naibabiji/wp-panel/main/install-cn.sh | bashIf the above script prompts [WARN] gh.wp-panel.org fetch failed, trying direct connection to GitHub... during installation, you can try the following command (press CTRL + C to interrupt the task, then copy and paste the new command and press Enter):
apt-get install -y wget ca-certificates && wget -qO- https://cdn.jsdelivr.net/gh/naibabiji/wp-panel@main/install-cn.sh | bashThis command will first update the software sources and install necessary dependencies, then download and execute the installation script. The entire installation process takes about 5-10 minutes. The script will automatically configure Nginx, PHP, MariaDB, and other environments, and finally output the panel's access address and initial administrator account password. Please save this information properly.
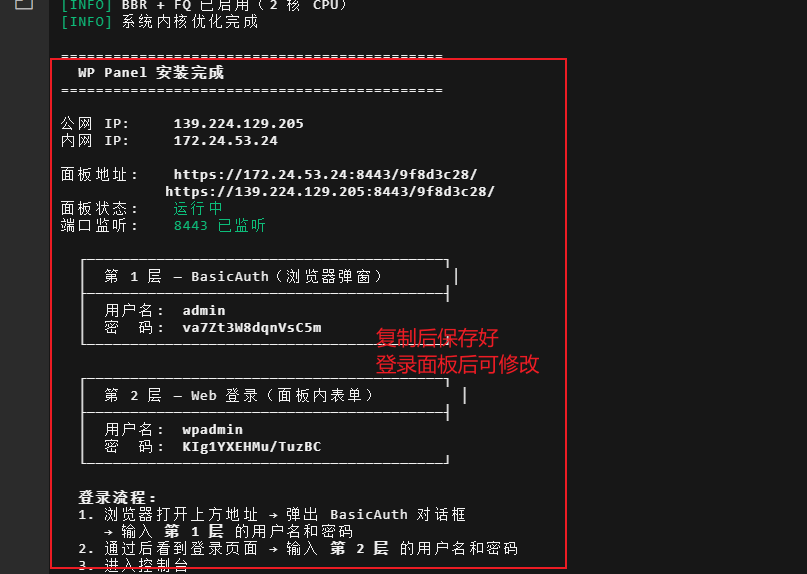
After installation, you can access the WP Panel backend via a browser.
WP Panel excels inInstallation Transparency. For details, refer toWP Panel Installation Script Security Transparency Report. Its code is open source and has been audited by the community, ensuring security.
Additionally, WP Panel does not support arbitrary PHP version switching by default, which is to maintain environment consistency and reduce the risk of misoperation. If you have questions about this, you can read the explanatory articleWhy Doesn't WP Panel Support PHP Version Switching by Default? to understand its design philosophy.
Step 4: Allow Port 8443 in Firewall
By default, Alibaba Cloud firewall does not open port 8443, so we need to manually open it.
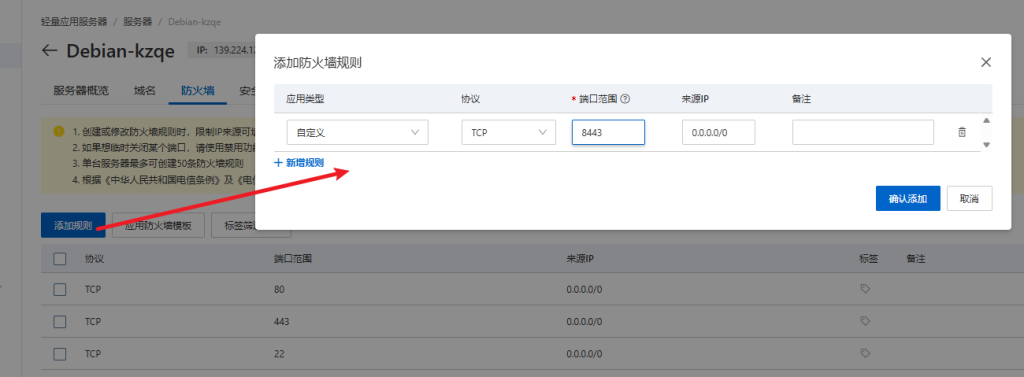
Step 5: One-Click Install WordPress Site
Before installing a site, it is best to point your domain to your server IP so that you can directly apply for an SSL certificate when creating the site.
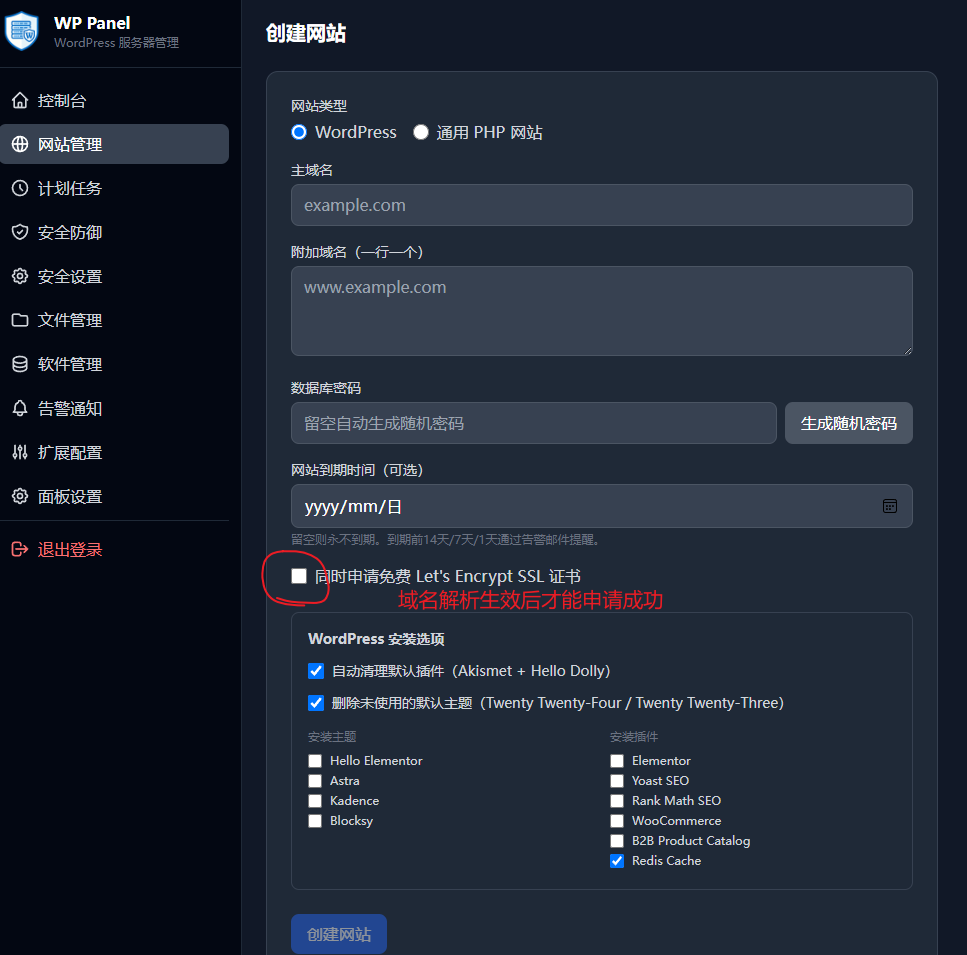
After successfully creating the site, open your site in a browser, select the site language, fill in the site name and your username, and complete the WordPress installation.
Summary and Call to Action
Through the above 5 steps, we have successfully reinstalled a clean Debian 13 system on an Alibaba Cloud server and deployed WP Panel. Compared to traditional panels, WP Panel not only has lower resource usage and more transparent security mechanisms but is also deeply optimized for WordPress sites. If you are looking for alightweight, efficient, and secureWordPress management panel, give it a try now. You can also see more detailed performance data in theWP Panel vs. Baota Panel vs. 1Panel Actual Comparison to further verify its advantages.
Final Reminder: Please regularly update the panel and security patches, and ensure the server firewall configuration is correct. Wishing you a smooth and efficient WordPress journey!