No Linux commands required,
to get WP Panel installed
When moving from shared hosting to a VPS, the biggest worry isn't buying the server—it's not knowing how to connect, how to install, or what to do if the installation breaks. WP Panel Assistant puts these steps into a single Windows window.
You only need to enter your server details, confirm once, and then watch the official installation command run in the terminal.
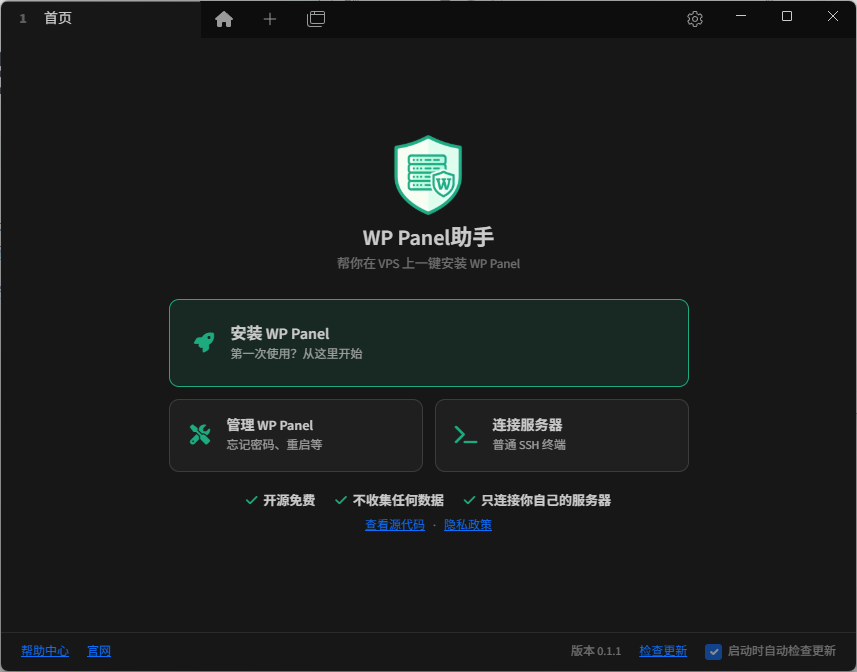
Windows 10/11 64-bit · Simplified Chinese and English · Based on Tabby · GPL-3.0
From shared hosting to VPS, no need to learn server administration first
The server is still yours, and the commands are still visible; you just no longer have to figure out connecting, confirming, and recovering the installation on your own.
01Fill in the details and you're ready to start
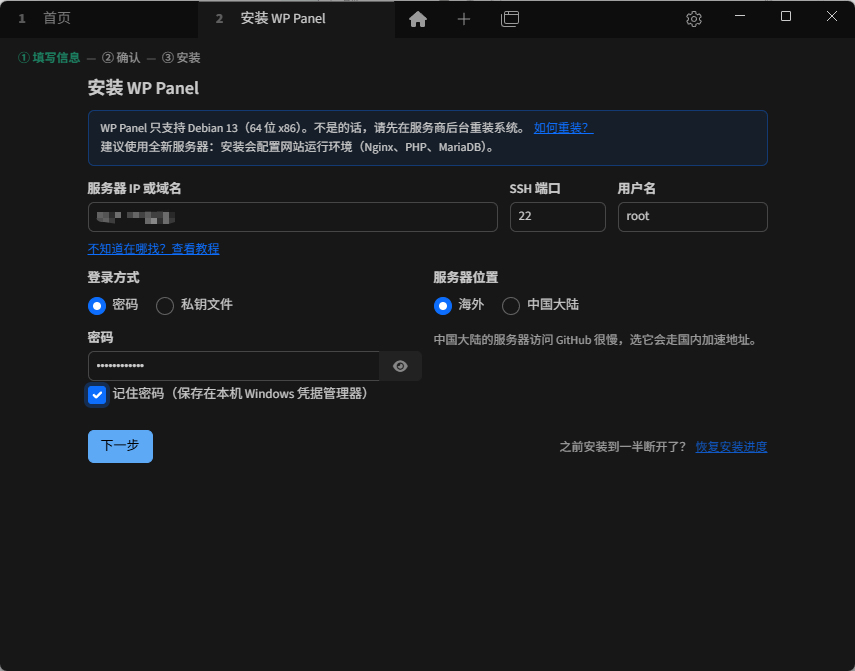
Enter the IP, SSH port, username, and password; the assistant connects to your server for you and asks you to confirm the server fingerprint on the first connection.
02No need to type installation commands by hand
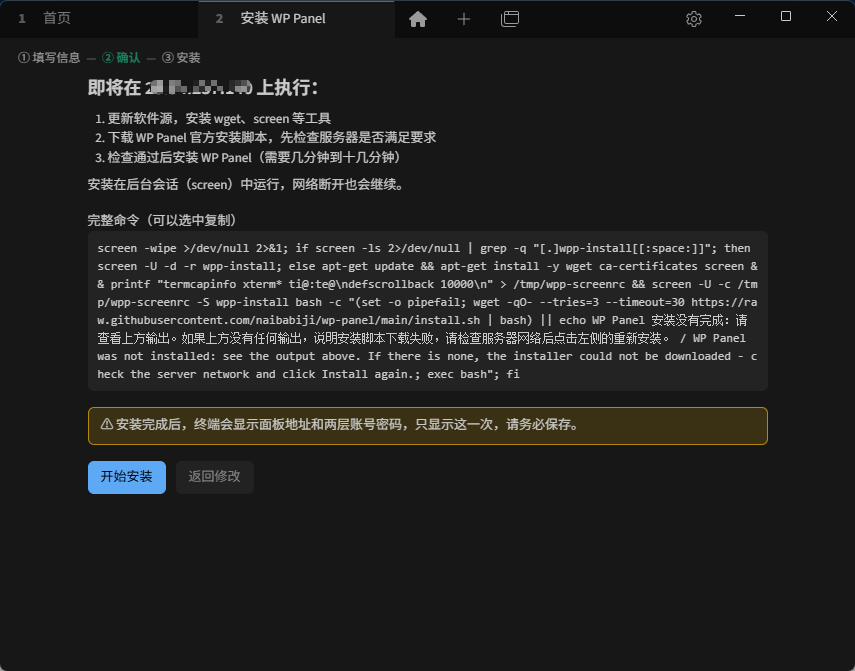
The full command is shown to you first; after you click „Start Installation,“ the assistant enters the official WP Panel command into a visible terminal and never executes anything behind the scenes.
03Manage with the panel after installation
Once installed, open the WP Panel web panel to manage your website, SSL, files, databases, backups, and updates through a visual interface, reducing the need to type commands manually.
Enter information, confirm, and save the result
No need to copy and paste long commands, and no need to guess what to do next.
Enter server information
Enter the IP, SSH port, username, and password. These are usually the items found in your provider's email or console.
Confirm and start installation
On the first connection, confirm the server fingerprint, review the full command once more, and click „Start Installation“.
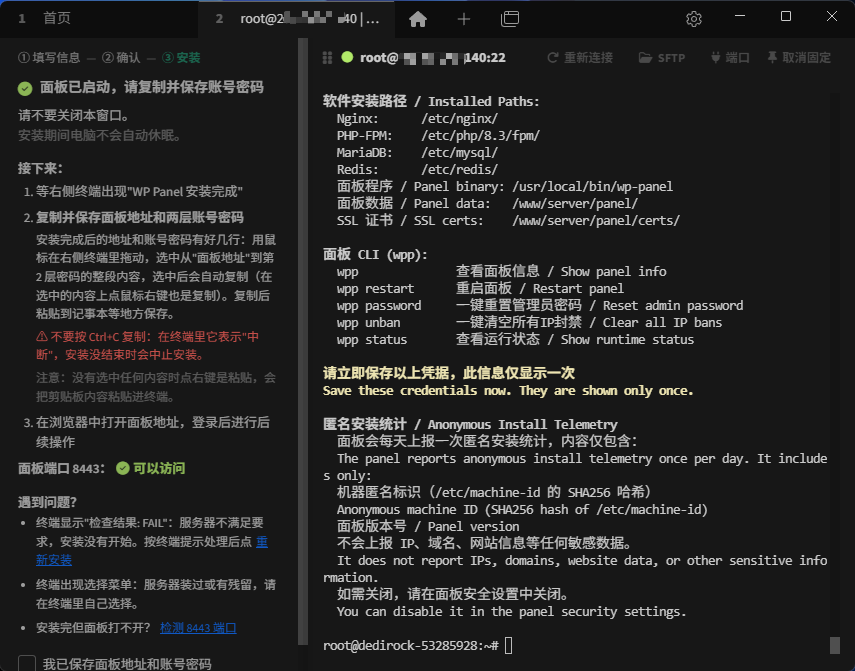
Copy the address and password
After installation completes, the terminal displays the panel address and two levels of account credentials; copy and save them, then log in via your browser.
After installation, common operations are one click away
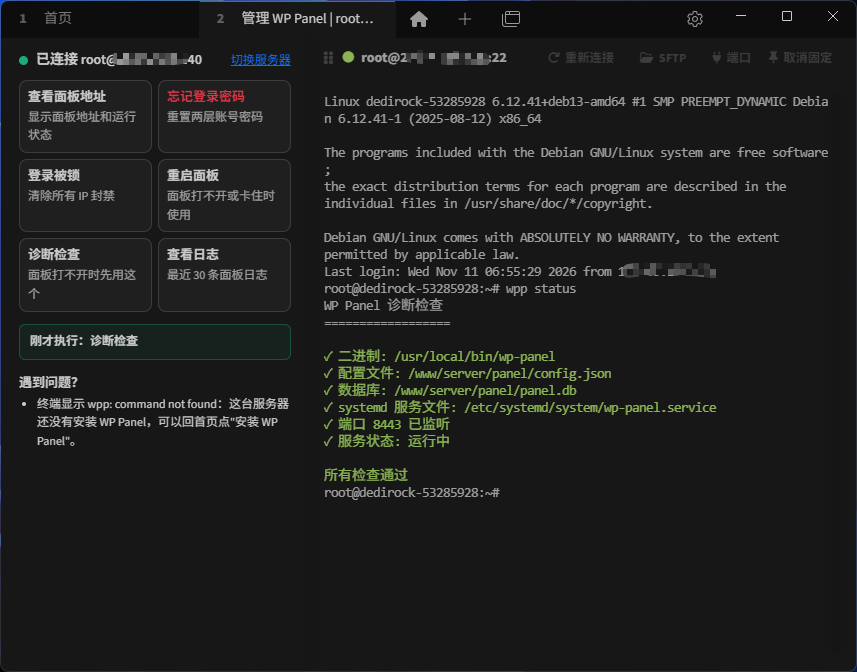
Installation is only the first step. If the panel address won't open, you forget your password, or your login is locked, return to the assistant to find the corresponding action.
01Install WP Panel
Start even without command knowledge: fill in the information, confirm the command, and the assistant places the official installation process into the terminal.
02查看面板地址
Forgot the address? Reconnect and click once to view it.
03忘记登录密码
Immediately reset both levels of login credentials; the old password takes effect no longer, so save the new password as prompted.
04Login Locked
When login is blocked, clear the IP ban and reopen the panel.
05Restart Panel
面板卡住或打不开时,执行官方重启命令。
06Diagnostic Check
不知道哪里出问题?先运行诊断,把结果留在终端里看。
07View Logs
查看最近日志,把具体错误复制给自己或反馈时使用。
08SSH / SFTP
除了安装面板,也可以继续当普通 SSH / SFTP 客户端用。
09可视化管理 VPS
After installation, access the WP Panel web interface to manage websites, SSL, files, databases, backups, and updates.
From filling in information to installation completion, and then to the management panel
Filling in, confirmation, installation output, and post-installation management all happen in the same window; if the connection drops midway, you can come back and continue.
Download once, upgrade anytime
The software homepage will prompt you when a new version is available. Download the new installer and install it directly over the existing version; your settings, saved servers, and remembered passwords will all be preserved.
The GitHub Release page also provides SHA256 checksums for verifying the installer.
Prepare these before you begin
- Windows 10 or Windows 11, 64-bit
- Debian 13, x86_64 server
- Allow port 8443 in the cloud server security group
- We recommend using a freshly reinstalled, clean server
Windows may display a security warning
Because we have not purchased a software signing service, Windows may display „Windows protected your PC“ during installation. Please click „More info“, confirm that the installer comes from the official download channel provided on this page, and then click „Run anyway“ to continue the installation.
Connect only to your own servers
No usage statistics are collected, no crash reports are sent, and no server information, passwords, or terminal content are uploaded. The only network exception is checking for updates; see details in隐私政策。
GPL-3.0, based on Tabby
To report an issue, please visitGitHub Issuesor contact [email protected] or WeChat vv15_zhi.